|
Use a seta para acompanhar o
tutorial.

|
Roteiro:
1. Abra uma nova
imagem transparente 850 x 700 px.
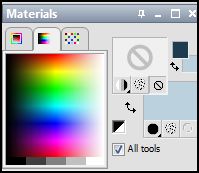
Configure na
paleta de materiais:
Foreground:
#1e3d4f
Background:
#bbd1de
Forme um
gradiente Linear - Angle: 0 - Repeat: 0
Flood fill (baldinho)
na imagem.
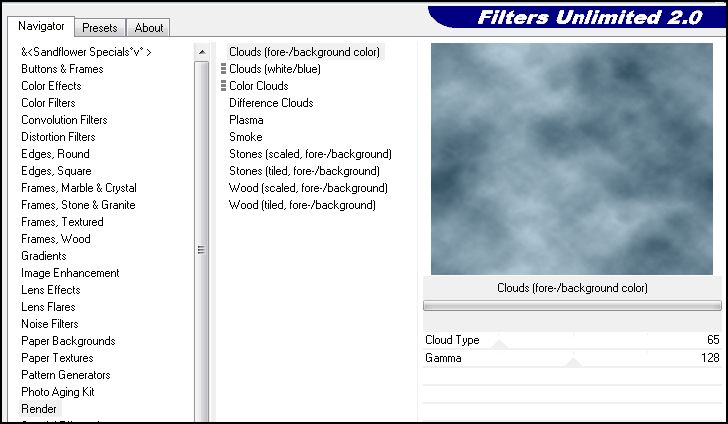
Effects -
Plugins - Unlimeted 2.0 - Render - Clouds (fore-/background
color:
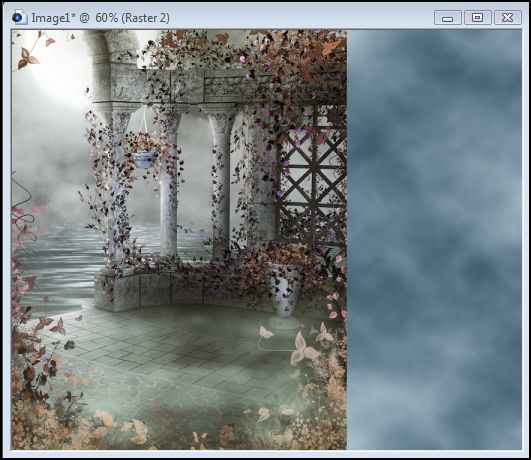
2. New raster layer
Abra a imagem JPEG
"BeautifulGothic4-5" - Copy
Paste as new layer e posicione
no lado esquerdo:
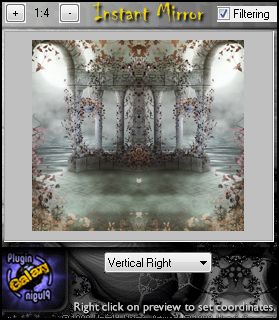
Effects - Plugins - Galaxy -
Instant Mirror:
Mude o blend mode para
Luminance (L)
Edge Effects - Enhace
3. Abra o tube
"Devilsinside_472_2009" - Copy
Paste as new layer
Adjust - Hue and Saturantion -
Colorize:
Hue: 144 - Saturation: 115
Posicione no lado direito da
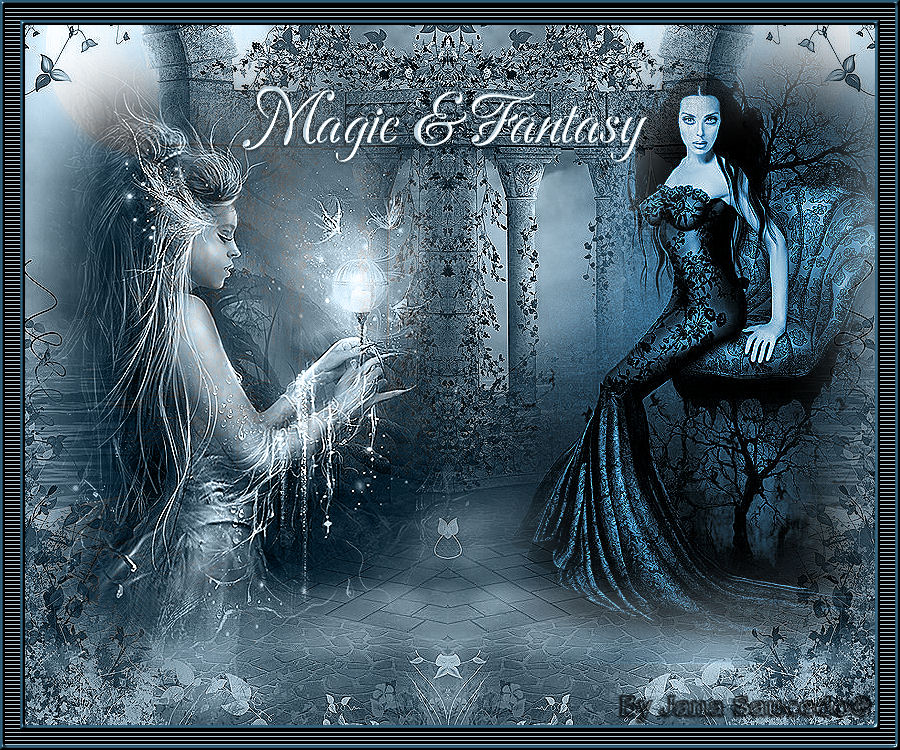
imagem (veja tag final)
Enhace
4. Abra o tube
"Devilsinside_Exclusiv_102_2009" - Copy
Paste as new layer - Mirror
Hue and Saturation - Colorize
na mesma configuração anterior.
Posicione no lado direito da
imagem (veja tag final)
Enhace
5. New raster layer
Ative a ferramenta texto nessa
configuração:

Na paleta de cores deixe o
foreground null:
Escreva seu texto
User Defined Filter : Emboss_3
Drop Shadow à seu gosto
Adicione sua assinatura ou
marca d'água.
6. Image - Add Borders:
5 px. - Symmetric - Color:
Foreground
Select all - Modify - Contract:
5 - Invert
3D effects - Inner Bevel:
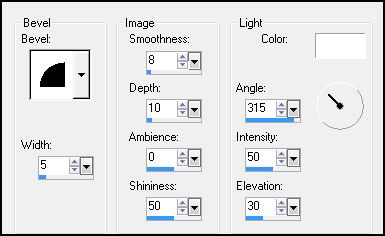
Select none
Add Border - 15 px. -
Symmetric - Color: Background
Add Border - 5 px. - Symmetric
- Color: Foreground
Select all - Modify - Contract:
5 - Invert
3D effects - Inner Bevel na
mesma configuração anterior
Select none.
7. Ative a ferramenta Magic
Wand (varinha mágica)
Selecione a borda de 15 px.
Effects - Plugins - Richard
Rosenman - Scanlines:
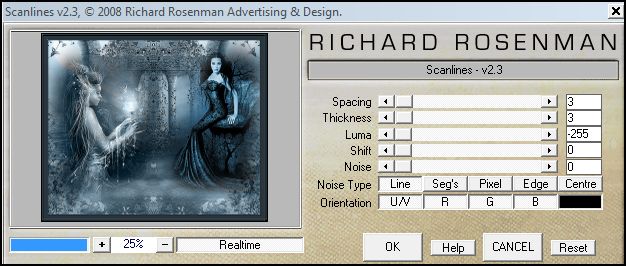
Select none
8. Salve como JPEG e está
pronto!!!

MENU
MEUS TUTORIAIS
Design by Jana Saucedo®
Copyright© 2009 by Jana Saucedo
Todos os direitos reservados.